Anyone who does enough container gardening will eventually face the problem of a root bound plant. Fortunately, resolving this issue through root pruning is a relatively straightforward process. Although some are hesitant to engage in root pruning, there is no reason you should be fearful of this standard gardening chore.
To help you gain greater comfort in knowing how to root prune root bound plants, we’ve created this guide. We’ll begin by covering the basics of what a root bound plant is. Then we will proceed to a simple five-step process that you can use anytime one of your plants becomes root bound.
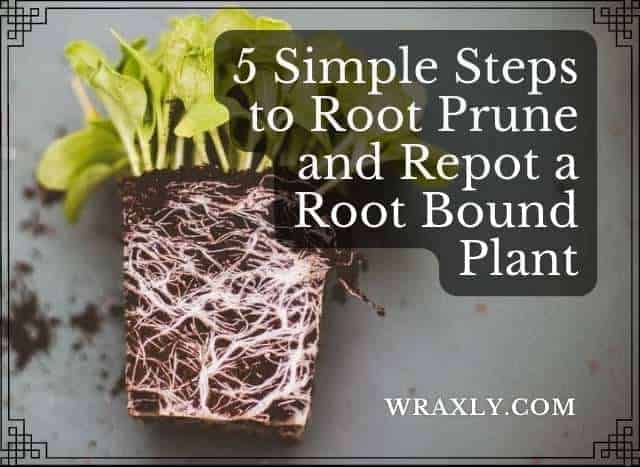
Table of contents
What Does Root Bound Mean?
Containers are advantageous to gardeners for a multitude of reasons. But they also come with some limitations. One of the most prominent of these limitations is the fact that container plants have a finite space in which their roots can grow.
By contrast, an outdoor plant often has ample nearby soil through which its roots can continue to spread. A plant growing in a container does not have that luxury but will expand its root system, nonetheless. That continual expansion is what gives rise to a root bound plant.
When a plant begins to outgrow its container, its roots run out of room to spread. This causes the roots to become tangled with one another at the edge of the container. Once the roots become intertwined, the plant’s health can begin to decline. Often the symptoms of a root bound plant are similar to one that is lacking soil moisture.
A plant may become root bound because it outgrew its container. Or the plant’s container may have been too small from the beginning. The same issue can arise for outdoor trees and shrubs when they grow in a limited space. Regardless of the cause, your best approach is to resolve your root bound plant issue right away.
Fixing a Root Bound Plant
There are two main ways that you can fix a root bound plant. Each one is equally effective, but they come with different levels of effort on your part. Those two approaches are to:
- Transplant the root bound plant to a new container
- Root prune and return the plant to its original container
Transplanting your root bound plant is a quicker resolution. By giving your plant more space, the roots will eventually begin to spread on their own. But on some occasions, you may wish to keep a root bound plant in its container. For those situations, root pruning is your best bet. Let’s now move on to a quick method for doing that.
A Basic Root Pruning Process
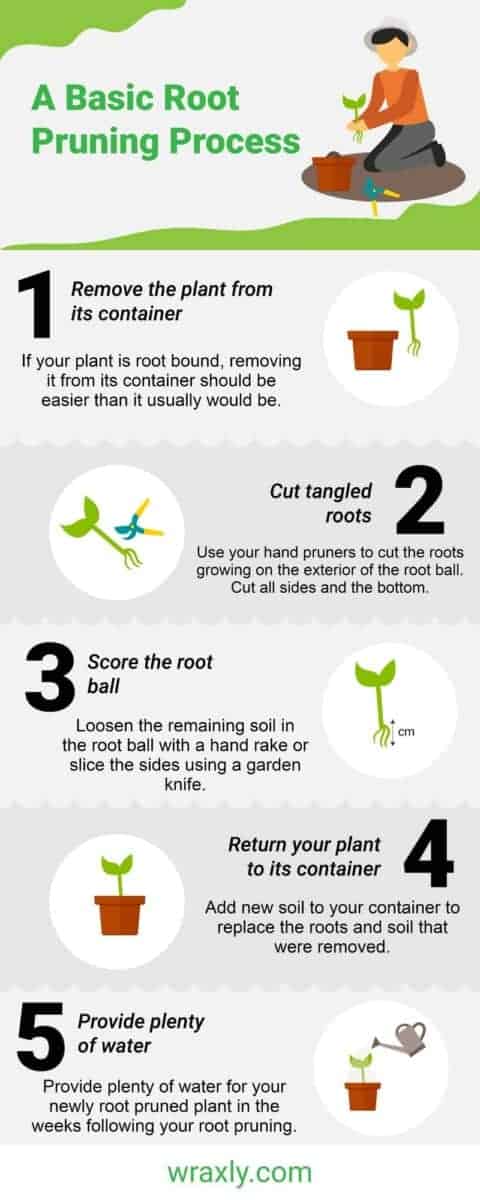
The task of root pruning a root bound plant seems daunting at first, but the process is likely more manageable than you think. To illustrate this point, we have divided the root pruning process into five easy parts. Read on to develop your root pruning skills.
Remove the Plant from its Container
At first, you may not know if your plant is root bound. You may only know that your plant appears to be in less-than-perfect health. As we mentioned earlier, a root bound plant will go on the decline, but its symptoms will be very similar to those of a plant that just needs more water.
The only way to tell if a plant is root bound is to remove the plant from its container. If your plant is root bound, removing it from its container should be easier than it usually would be. The roots of a root bound plant form a mass that follows the interior shape of the container. When you pull the plant, those root masses tend to slide out of the container more easily.
Still, you should exercise caution when removing a plant from its container. You may feel some resistance while removing the plant. If you do, try using these removal tips to help you get your plant out without causing damage:
- Grip the plant from the base of its main stem
- Run a garden knife along the interior edge of the container
- Invert the container carefully
- Gently squeeze the container if it is made of a soft material
- Avoid grasping any flowers or foliage
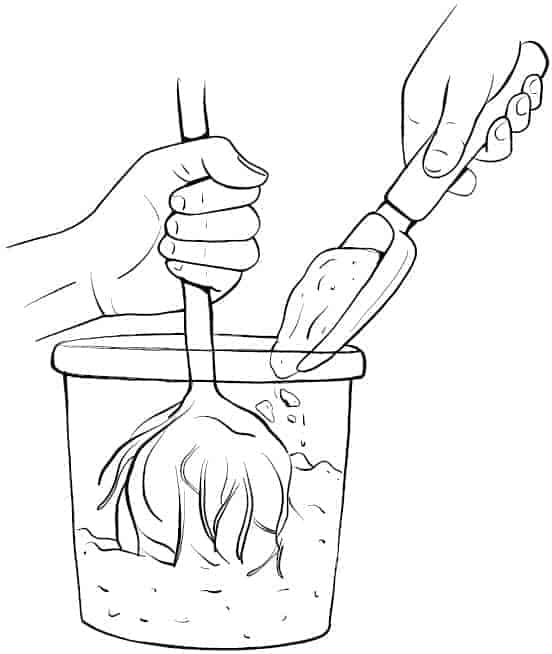
Once you have successfully removed the plant, you can inspect the root ball to see if there are any visual signs of root binding. Those signs should be obvious. If you see masses of roots covering the outside of the root ball, then you can proceed to your next root pruning step. If not, the cause of your plant’s poor health is something else.
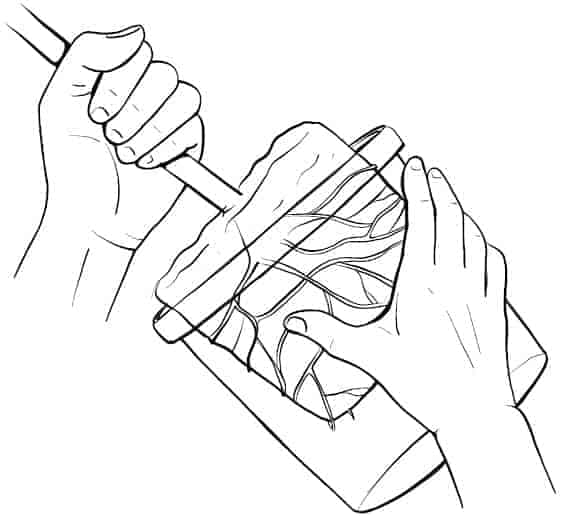
Cut Tangled Roots
Now that you have the plant out of its container and you have determined that it is root bound, you can begin the most essential part of the root pruning process. This is also the part of the process that makes people most hesitant to engage in root pruning.
Our Top Pruning Shears Recommendations
| Image | Title | Prime | Buy |
|---|---|---|---|
 Top
Top
Top
Top | EnduroPRO Titanium Pruning Shears - Ergonomic Gardening Tool for Effortless Cuts | PrimeEligible | Check Price on Amazon |
Top | KAKURI Japanese Pruning Shears for Gardening Heavy Duty, Made in JAPAN, 8 Inch High Quality Forged Japanese Carbon Steel, Professional Garden Pruners with Leather Sheath, Silver Black | PrimeEligible | Check Price on Amazon |
 Top
Top
Top
Top | Mueller Soft Grip Garden Pruning Shears, Durable Hardened Titanium Blades, 1.2" Cutting Diameter, Blade Lock | PrimeEligible | Check Price on Amazon |
 | Fiskars Pruning Shears, Sharp Precision-ground Steel Blade, 5.5” Plant Clippers | PrimeEligible | Check Price on Amazon |
 | Mr. Pen- Pruning Shears, 8" Professional | PrimeEligible | Check Price on Amazon |
 | Gonicc 8" Professional Pruning Shears | PrimeEligible | Check Price on Amazon |
 | Red Pruning Shears,Titanium Alloy High Carbon Steel Manual Grey Garden Shears, 8 Inch | PrimeEligible | Check Price on Amazon |
At this stage, you should use your hand pruners to cut the roots growing on the exterior of the root ball. Cut all sides and the bottom. You don’t need to worry too much about cutting large or small roots. Your plant’s root system will likely be resilient enough to survive your vigorous cutting.
Your goal at this point is to remove some of the root mass. Considering you will be returning the plant to the same container, you must diminish the overall volume of the root mass to some degree. That way, your plant’s roots will no longer fill the entirety of the container, allowing you to add additional new soil.
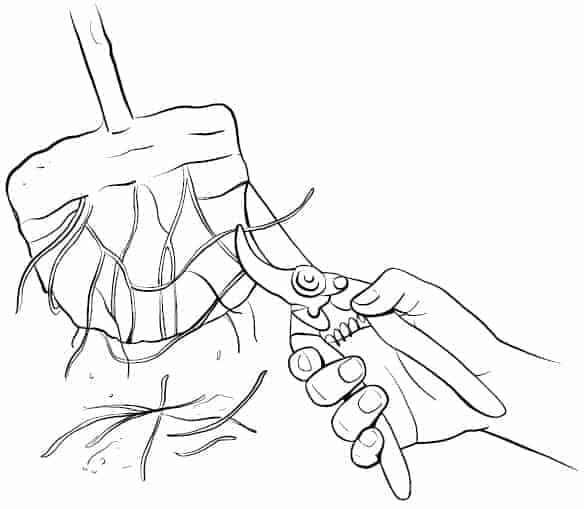
Once you have cut all sides of the root ball, the majority of your root pruning work is done. Now your main challenge is to get your plant back into its container correctly.
Score the Root Ball
After performing your root pruning, it is time to prepare your plant to return to its container. The best way to do that is to rough up the exterior sides of the root ball.
Often, the best method for this step is to score the sides with a hand rake. Alternatively, you can slice the sides of the root ball using a garden knife.
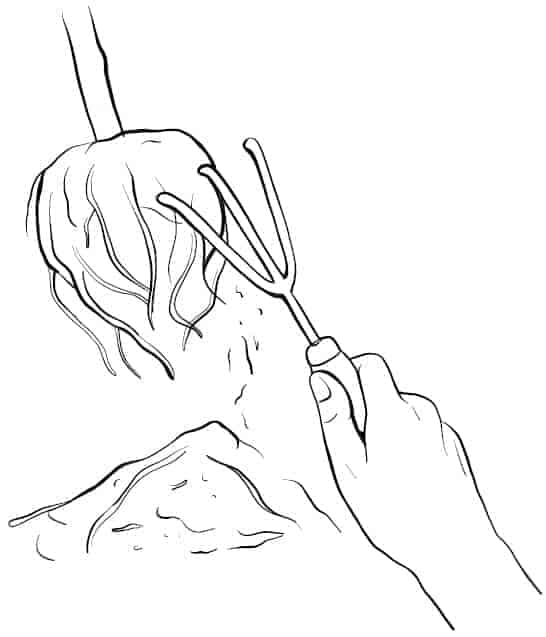
With either method, you are working on loosening the remaining soil in the root ball. The mass of bound roots could have caused the remaining soil to become compacted. When soil is compacted, it is difficult for roots to grow through.
By scoring the root ball, you are making it much easier for the remaining roots to spread through the soil. This will make it much easier for your plant to resume its healthy growth once it returns to its container.
Return Your Plant to its Container
Your next step in the root pruning process is to prepare your container for the return of your plant. Remember that during the pruning stage, you removed a reasonable amount of the roots and the soil. That means that you will need to add some new soil to your container to make up for that empty space.
Be sure to select a high-quality potting soil that will supply the roots with the nutrients they need to grow. You may also want to give the roots some further encouragement through fertilization.
It is important that you follow good planting techniques as well when you put your root pruned plant back into its container. For example, you should make sure that you position the plant at the proper depth in relation to the surface of the soil.
The roots should be covered entirely, but they also should not be too deep. Provided that you can replant your root pruned plant correctly, you are ready to continue to our last tip.
Provide Plenty of Water
Any time that you transplant or root prune a plant, the plant can experience some stress during the process. This stress, often called transplant shock, is normal and should not cause too much of a concern. But there is one simple way that you can help your plant overcome this stage.
Provide plenty of water for your newly root pruned plant in the weeks following your root pruning. Through generous watering, you can help the root system overcome the damage that is an inherent part of root pruning.
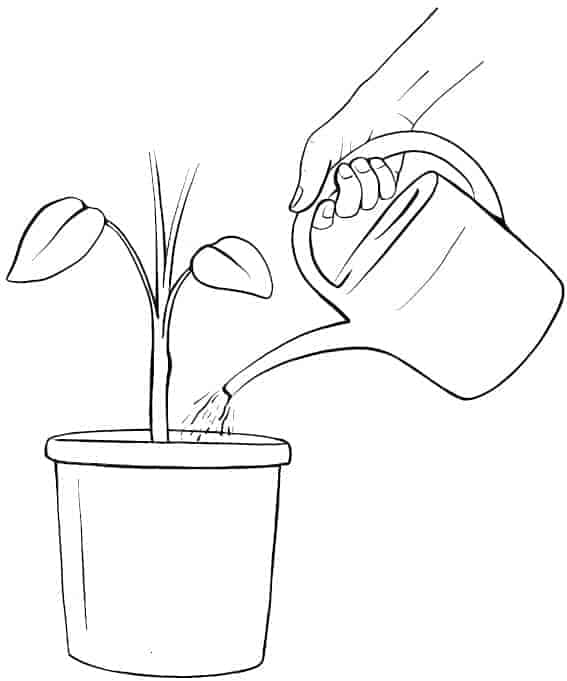
During the time after you do your root pruning, your plant may appear slightly more wilted than usual. But within two or three weeks, your plant should return to full health. At that point, you can return to your regular watering schedule.
Last thoughts on how to root prune root bound plants
As you now know, root pruning is nothing to fear as you proceed on your container gardening ventures. Occasionally, one of your plants may become root bound. When that happens, keep your cool and remember that you have two viable options at your disposal. You can choose to transplant your plant to a larger container, or you can root prune your plant and return it to the same container.
If you choose the second route, use this article as your beginner’s guide to root pruning container plants. In doing so, you’ll find that reviving a root bound plant is much easier than your thought.
Sources:

John Haryasz is a freelance writer and landscape designer. In the field of landscape architecture, he has contributed to many successful design projects throughout the country. As a writer, John specializes in creating captivating and informative web content. Through that work, he aims to share his design knowledge and promote engagement with the outdoor world.
![How to Water Indoor Plants [Plant Care 101]](https://wraxly.com/wp-content/uploads/2021/03/How-to-Water-Indoor-Plants-Plant-Care-101-1200-1024x576.webp)
![Growing Plants from Cuttings [A Simple Guide]](https://wraxly.com/wp-content/uploads/2021/03/Growing-Plants-from-Cuttings-A-Simple-Guide-1200-1024x576.webp)